Microsoft Office 365 Exchange
Set up Azure
First, you need to contact your Azure administrator and ask for three parameters which you’ll need when you create a connector.
Application (Client) ID
Client Secret
Directory (Tenant) ID
You can read the Azure procedure here.
Create the data source in NOW Privacy
In NOW Privacy, create a data source:
From the main menu select Data Sources
Click New ⇾ New Data Source
In the New Data Source dialog, select the dataset this new data source will belong to by:
choosing an existing dataset from the dropdown, or
clicking Add to new Data Set and typing the name of your dataset
If you use option 3b, remember to add the dataset to at least one security group
If you don’t, no users will be able to see the data from this data source
Click Next
Select the Office 365 data source and click Next
Select which Office 365 service you want to use: Exchange, SharePoint, or OneDrive
Enter the Azure credentials for this data source
Your Azure administrator can supply these
Think about the ingestion scope you want to use
If you’re crawling a user or a group of users, find the:
domain name
email address for the user or group of users
For this scope:
We crawl mailbox content for this:
Everything
All users that a tenant has.
Domain
All users belonging to a domain under the tenant.
Group email
All users belonging to a domain group.
User email
An individual domain user.
For distribution list emails, set the scope to Group email
For individual user or shared user mailboxes, set the scope to User email
Optionally, click Test Credentials
NOW Privacy validates them and shows you what the credentials allow you to crawl
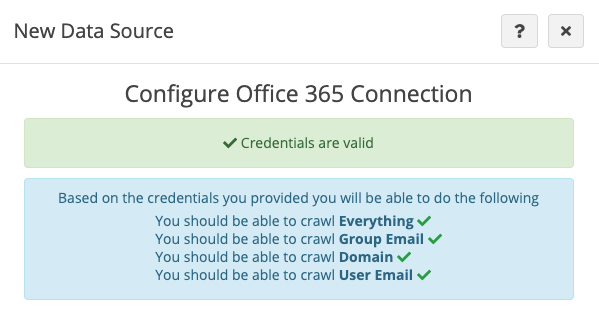
If you see that you don’t have access to something you need to crawl, contact your Azure administrator
Click Next
Choose your ingestion scope:
Everything
Domain
Group email
User email
Fill in the domain and email if needed
If the scope is Everything, you don’t need any parameters
Optionally, click Test Connection
Note
In most cases, this test is reliable. However, you might want to configure a data source before the target server is available, or perhaps during a scheduled maintenance window when the check isn’t possible.
Also, Office 365 cannot be fully validated without attempting to crawl data.
The Ignore this warning checkbox allows you to set up the data source even if validation fails.
Field
Description
Domain
The id of a Microsoft tenant-held domain. For example: nowvertical.onmicrosoft.com.
If the ingestion scope is Group Email, this is an email address that identifies a user group. For example: group@example.com. If the ingestion scope is User Email, this is the email address for an individual user.
Select the country for this data source and click Next
The country is used in geographical visualisations
Optionally, click Add Custom Description
This allows you to use you own description for this data source, rather than accept the default description that NOW Privacy provides
Set the Crawl priority
Specify whether you want to crawl once or continuously
Click Start Crawl Immediately if you want to crawl the data right now
Or you can start a crawl manually anytime you want
Click Create Data Source
Limitations
We do not extract attachments from the calendar.
Only the user’s calendar is ingested. Any calendar shared with a user is ignored.
Only folders under the mailbox root folder will be ingested. As such, any email or other content moved to the root folder will not be ingested.
After the crawler runs, you can open any email that if finds if you have permissions on Office 365 Exchange to access that email. Make sure you log in to Office 365 first.
See also Microsoft Exchange on Premise