Select which Office 365 service you want to use: Exchange, SharePoint, or OneDrive
Enter the Azure credentials for this data source
Your Azure administrator can supply these
Think about the ingestion scope you want to use:
For this scope:
We crawl for this:
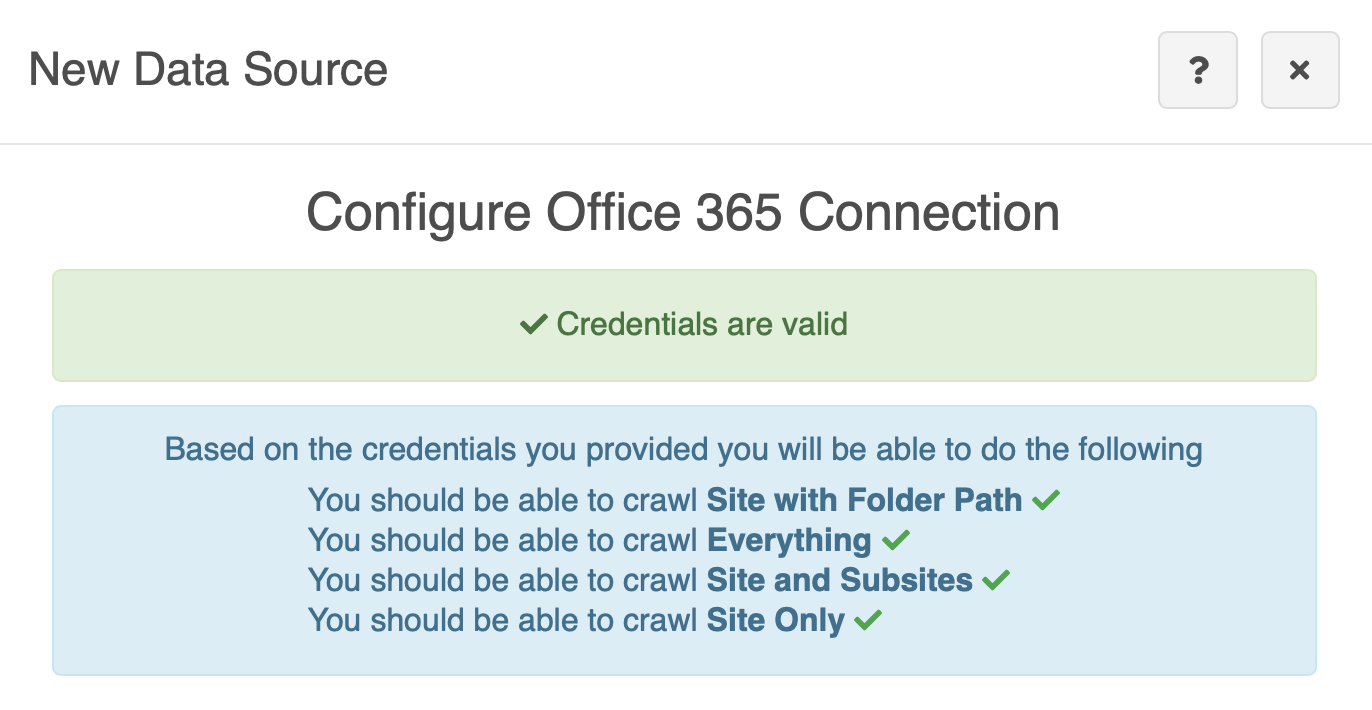
Everything
All available sites, and all subsites under them.
Site only
The content of a specified site or subsite.
Site and subsites
A specified site and its subsites.
Site with folder path
A specified path on a specified site.
A subsite is just like a site. Setting up a crawl on a subsite is just like setting
up a crawl on a site.
Optionally, click Test Credentials
NOW Privacy validates them and shows you what the credentials allow you to crawl
Click Next
Choose your ingestion scope:
Everything
Site only
Site and subsites
Site with folder path
Fill in the Site URL and Folder path if needed.
If the scope is Everything, you don’t need any parameters.
Note
In most cases, this test is reliable.
However, you might want to configure a data source before the
target server is available, or perhaps during a scheduled
maintenance window when the check isn’t possible.
Also, Office 365 cannot be fully validated without attempting to crawl data.
The Ignore this warning
checkbox allows you to set up the data source even if validation fails.
Field
Description
Site URL
If the ingestion scope is Site Only,
Site with Subsites, or Site with
Folder Path, specify the site on your
SharePoint server.
Folder Path
If the ingestion scope is Site with
Folder Path, specify the path to target
on the site.
Select the country for this data source and click Next
The country is used in geographical visualisations