Running Exonar
The next steps are:
Log in to Exonar
Connect to your data
Begin to use Exonar’s dashboards and search
Logging in
The last step of the installation process gave you a URL. To log in:
Open a browser and visit that URL
We don’t know your environment so we cannot generate an SSL certificate. That means your browser might give a security warning.
Don’t be alarmed. It is safe to continue.
Log in with:
Username: exonaradmin
Password: ExonarIsGreat!
Change your password the first time you log in
You’ll be prompted to make this change
Note: you’ll need the password each time you log in
Connecting to your data
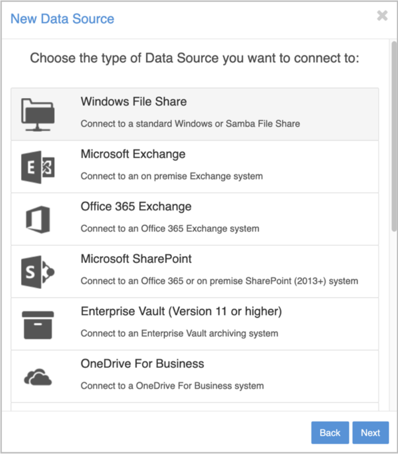
You need to connect Exonar to your data. To do this you need to configure a Data Source. Some common data sources are:
To create a new data source:
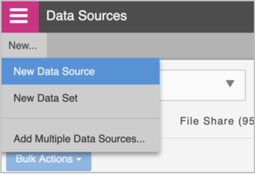
From the pink main menu select Data Sources

Select New… ⇾ New Data Source

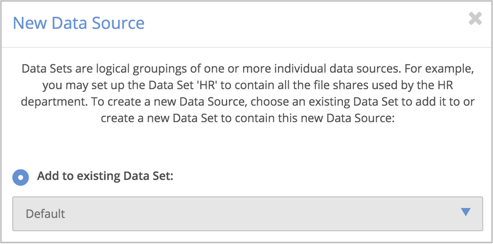
Add the new data source to the Default Data Set that has been pre-created

The exonaradmin user has permission to access this data set
In production, data sets might be, for example: Legal, HR, Marketing
Choose your data source type

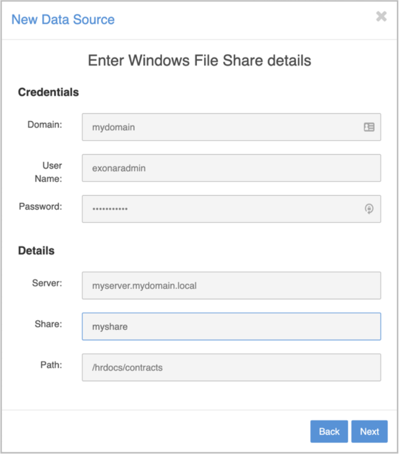
Configure your data source. For example:

